To install window shrouds for smoke prevention, which is a crucial step in your survival preparedness plan, start by measuring your window frame’s width and height to ensure a snug fit. Gather the necessary materials like weatherproofing sealant and mounting hardware that can withstand harsh conditions. Clean the frame thoroughly, applying sealant to any gaps to prevent smoke infiltration. Then, securely attach the shroud using brackets or strong adhesive to ensure it stays in place during emergencies. Finally, perform a smoke test to check for any leaks, ensuring your home remains a safe haven. Following these steps will enhance your safety and readiness; stick around to discover more survival tips and techniques!
Key Takeaways
- Accurately measure your window dimensions, ensuring you use the smallest width and height to achieve a snug fit for the smoke shroud, which is essential for your survival setup.
- Gather all necessary tools and materials, including a screwdriver, measuring tape, caulk, and appropriate mounting hardware, to equip yourself for effective installation.
- Thoroughly clean the window frame to ensure optimal adhesion and a secure fit of the shroud, as maintaining your shelter’s integrity is crucial in a survival situation.
- Apply a weatherproof sealant around the window frame to eliminate any gaps or leaks that could compromise your protection against smoke and other elements in emergency scenarios.
- Conduct a thorough final inspection for any drafts, sealing any detected gaps before installing the shroud to maximize its effectiveness and enhance your preparedness measures.
Understanding Window Shrouds and Their Purpose
Window shrouds are a crucial component of a survivalist’s fire safety strategy, as they help prevent smoke from entering a shelter during emergencies.
These shrouds serve as a protective barrier, made from durable materials such as metal, plastic, or fire-resistant fabrics, and can be customized to meet specific needs and local fire regulations.
Window shrouds act as a vital protective barrier, crafted from sturdy materials like metal, plastic, or fire-resistant fabrics, tailored to specific needs.
To ensure their effectiveness, it’s essential to install them with a tight seal around the window frame.
Some shrouds are designed to be adjustable or removable, allowing for natural light and ventilation when not in use, which is important for maintaining a livable environment.
Regular maintenance and inspections are necessary to ensure that your shrouds remain effective in blocking smoke and safeguarding your space during a fire emergency—an essential consideration for anyone preparing for unforeseen events.
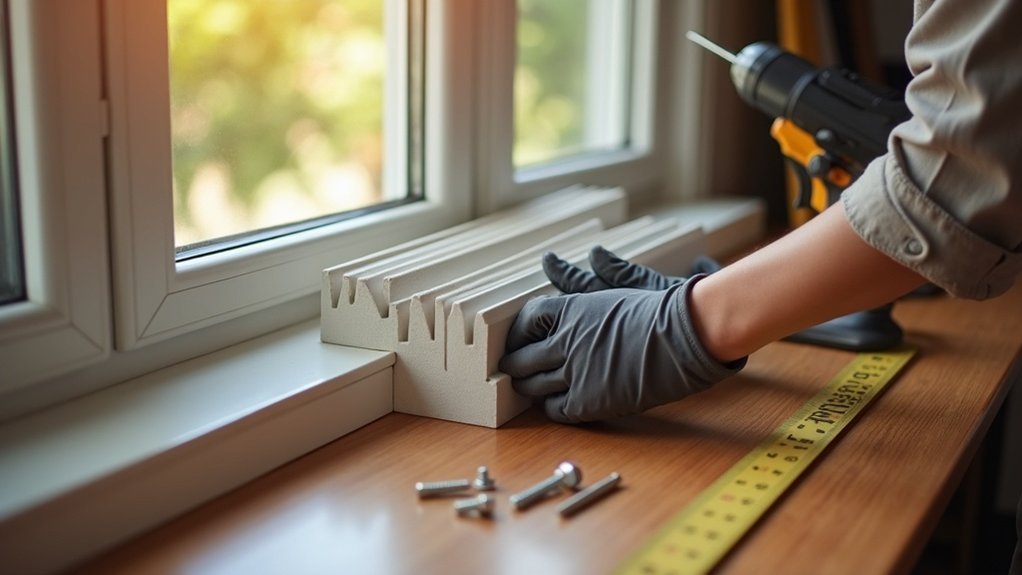
Measuring Your Window Frame for Accurate Fit
Accurate measurements are vital for ensuring your window shrouds fit perfectly, especially when preparing your home for survival situations.
Start by measuring the width of your window frame at the top, middle, and bottom, using the smallest measurement for a precise fit.
Next, measure the height from the top to the sill at both the left and right sides, again opting for the smaller measurement.
Be sure to account for any trim or molding that could affect the fit, as these details could impact your home’s insulation and security during emergencies.
For optimal results, also consider the depth of the frame, as this can influence the effectiveness of your window coverings.
Finally, double-check all measurements before cutting materials to avoid errors that could lead to gaps, which might compromise your home’s safety and preparedness.
Gathering Necessary Materials for Installation
Before you embark on the installation process, it’s crucial to gather all the necessary materials to ensure a smooth and efficient setup, particularly for your survival and prepping needs.
Start by collecting essential tools such as a screwdriver, measuring tape, level, and utility knife for precise cutting.
Next, ensure you have the appropriate type of window shrouds; verify the specifications based on your window size and material to maintain security.
Don’t overlook the importance of weatherproofing materials, like caulk or foam tape, to seal edges and prevent smoke infiltration, which can be vital in emergency situations.
Gather compatible mounting hardware, such as brackets or screws, and consider equipping yourself with safety gear, including gloves and goggles, to protect yourself during installation.
Being well-prepared can make all the difference in a survival scenario.
Preparing the Window Frame for Shroud Attachment
Preparing your window frame for shroud attachment is a crucial step in enhancing your home’s security and insulation, especially in a survival situation.
Start by thoroughly cleaning the frame to remove any dust and debris that could compromise the shroud’s fit. Carefully measure the dimensions to ensure complete coverage, which is vital for effective protection against the elements.
Next, use a level to verify that the frame is straight and even; proper alignment is essential for a successful installation that can withstand harsh conditions.
Apply weatherproof sealant to any gaps or cracks to create a sturdy base and enhance insulation, keeping your space secure and energy-efficient.
Finally, pre-drill holes for screws or fasteners to simplify the shroud installation process and ensure precision.
You’re now well-prepared for the next steps in fortifying your home!
Securing the Shrouds: Adhesive vs. Brackets
When it comes to securing window shrouds for your survivalist or prepping needs, you have two primary options: adhesive or brackets. Both methods have their advantages, so consider your specific requirements for durability and functionality in survival situations. Adhesive offers a quick, seamless application but requires careful surface preparation to ensure a strong bond. Brackets provide a more robust attachment, which is ideal for situations where easy removal might be necessary.
| Method | Advantages |
|---|---|
| Adhesive | Quick application, clean look |
| Ideal for stealth and discretion | |
| Brackets | Secure, durable, easy to remove |
| Allows for potential upgrades | |
| May require visible hardware | |
| Can compromise frame integrity |
Evaluate factors like location, climate, and potential emergencies before making your choice to guarantee the best fit for your prepping project. Prioritize methods that enhance your overall preparedness and provide reliable security.
Final Checks for Gaps and Leaks
Once you’ve secured the window shrouds, it’s crucial to conduct a thorough inspection of the seals for any gaps that could allow smoke or other contaminants to escape, potentially compromising your safety in a survival situation.
Utilize a smoke pencil or incense stick to test for airflow around the edges; this method will help you identify any hidden leaks that may jeopardize your preparedness.
If you detect any drafts, promptly apply caulking or weather stripping to seal those gaps effectively, ensuring your shelter remains secure and resilient against environmental threats.
Inspect Window Seals
Before you begin installing window shrouds, it’s crucial to inspect the window seals for any gaps or leaks, as these can undermine your home’s energy efficiency and security.
Even small openings can compromise the shrouds’ effectiveness. Here’s a quick checklist to ensure your windows are ready for survival preparedness:
- Examine the Frame: Look for visible gaps or cracks around the window frame that could let in unwanted elements.
- Use a Flashlight: Shine a light around the edges; if light seeps through, you have a leak that could affect your shelter’s integrity.
- Feel for Drafts: Close the window and use your hand or a tissue to test for air movement, indicating potential vulnerabilities.
Ensure the weather stripping is intact, and apply caulking or foam sealant to fill any identified gaps.
This not only improves insulation but also enhances your home’s resilience against external conditions, making it a safer haven for you and your family during emergencies.
Test for Airflow
To ensure your window shrouds are properly sealed for survival situations, testing for airflow is crucial. Use a smoke pencil or incense stick to observe any movement of smoke, which can indicate potential gaps or leaks in your shrouds.
For optimal results, conduct this test on a windy day or utilize a fan to simulate air movement, which can help reveal weaknesses in your seals. Run your hand along the edges of the shroud to feel for drafts, allowing you to identify areas where air may escape, compromising your shelter’s integrity.
Seal any identified gaps with weather stripping or caulking to enhance your preparedness. Finally, re-test the area to ensure all leaks are effectively addressed and that airflow is contained, safeguarding your space against external elements.
Proper sealing is essential to maintain a secure environment, especially during times of uncertainty.