To create a soil moisture sensor that can aid in survival situations, gather the following materials: two galvanized nails, a wide bottle cap, a 10k ohm resistor, and jumper wires. Begin by securing the nails through the cap, ensuring they are positioned to penetrate the soil effectively. Solder wires to the nails for connectivity. Connect one nail to the A0 pin on your Arduino and the other to the 5V pin, placing a resistor between A0 and GND. This configuration allows you to monitor soil moisture levels, essential for maintaining healthy crops or plants in a self-sufficient lifestyle. Additionally, consider factors such as soil type and environmental conditions to optimize your sensor’s performance for sustainable living.
Key Takeaways
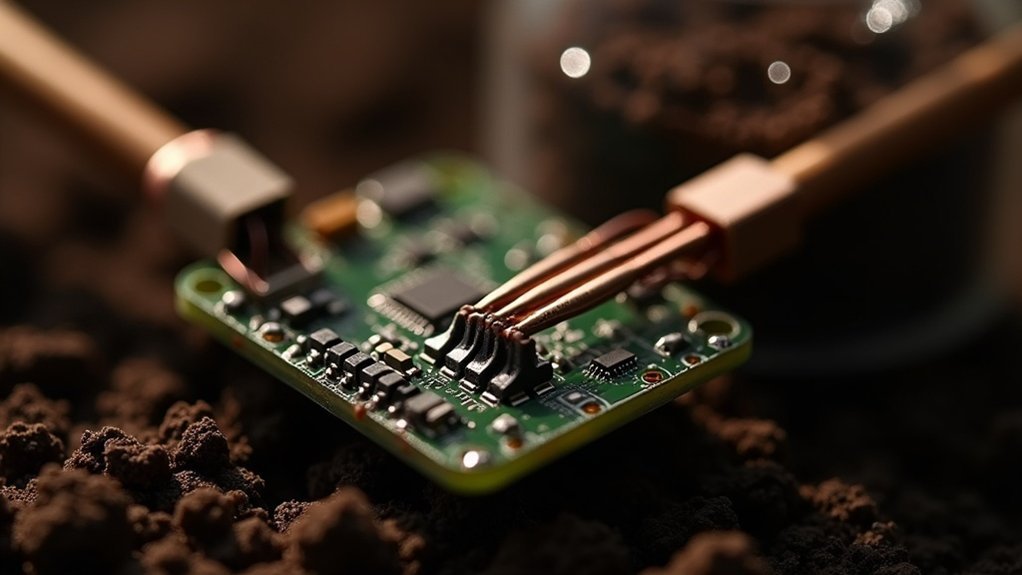
- Begin by constructing your soil moisture sensor, which is a valuable tool for ensuring the health of your survival garden. Insert two galvanized nails into a bottle cap, securing them with hot glue for added stability.
- Connect wires to each nail to interface with an Arduino, ensuring that one probe is linked to the A0 pin and the other to the 5V power supply.
- For accurate resistance readings that can help you determine when to water your plants, integrate a 10k ohm resistor between the A0 pin and GND in your moisture sensor circuit.
- Upload the appropriate code to the Arduino, allowing you to monitor soil moisture levels. Utilize the serial monitor to receive real-time data and set threshold values that align with your gardening needs.
- To enhance the longevity of your moisture sensor and reduce probe corrosion—an essential factor for long-term survival gardening—limit the continuous current flow and consider applying protective coatings to the probes for increased durability.
Required Parts and Tools
To build a soil moisture sensor for your survival gardening needs, you’ll need a few essential components. First, gather two galvanized nails, which will serve as probes to measure moisture levels in the soil.
Gather two galvanized nails as probes to create a reliable soil moisture sensor for your survival garden.
A wide bottle cap is necessary for assembly, ensuring a sturdy and stable base. A 10k ohm 1/4 watt resistor is crucial for providing reference resistance in the sensor circuit, allowing you to accurately gauge moisture levels.
You’ll also require female jumper wires to connect the probes to your Arduino or microcontroller, enabling you to monitor soil conditions efficiently. A soldering iron and solder wire will help secure the electronic connections for reliability.
Lastly, a hot glue gun is essential for stabilizing the probes within the bottle cap, enhancing the sensor’s durability for long-term use in your survival garden.
Making the Sensor
Begin by assembling your soil moisture sensor, a straightforward process that will enhance your survival gardening efforts.
Start by punching two galvanized nails through a bottle cap, ensuring they’re spaced about one inch apart for optimal readings in various soil conditions. Secure the nails with hot glue to prevent movement, then solder wires to each nail for reliable connection to your Arduino or similar microcontroller.
Fill the cap’s opening with hot glue to stabilize the sensor in the soil, ensuring it remains functional during adverse conditions. Connect a 10k ohm resistor between the A0 pin on the Arduino and GND for accurate readings, while attaching one probe to A0 and the other to a 5V pin to ensure proper functionality as you monitor your garden’s moisture levels.
This knowledge is crucial for maintaining a sustainable food source during challenging times.
Interfacing the Sensor With an Arduino
To interface your soil moisture sensor with an Arduino for survival gardening and preparedness, begin by establishing the correct wiring connections: connect one probe to the A0 analog pin and the other to a 5V pin to ensure reliable readings.
After that, upload the provided code to allow the sensor to monitor moisture levels accurately, which is crucial for maintaining healthy plants during uncertain times.
Finally, utilize the serial monitor in the Arduino IDE to observe real-time sensor readings, helping you assess the moisture conditions of your soil and make informed decisions for your survival garden.
Wiring Connections Explained
While setting up your soil moisture sensor for your survival garden, it’s crucial to ensure the correct wiring connections for optimal functionality.
Connect one galvanized nail (probe 1) to the A0 pin on the Arduino for measuring soil moisture levels, while the second nail (probe 2) should connect to the 5V pin for power.
A 10k ohm resistor is essential to link the A0 pin to the GND pin, providing a reference resistance for accurate readings.
Make sure the probes are securely attached to the bottle cap and that the wires are soldered properly to avoid disconnections.
This setup is fundamental for reliable sensor performance, ensuring you can maintain healthy soil conditions for your emergency food supply.
Uploading the Code
Uploading the code to your Arduino board is crucial for equipping it to gather soil moisture data from the sensor, which can be vital for effective survival gardening and prepping. Use the Arduino IDE to upload the provided code, ensuring your sensor probes are connected correctly to monitor soil conditions. Once the upload is complete, you can open the serial monitor to observe real-time moisture readings, helping you make informed decisions about when to irrigate your plants. You can also set a threshold value in the code to activate components like a water pump when moisture levels drop, ensuring your survival garden remains healthy.
| Step | Description |
|---|---|
| 1. Connect Probes | Connect one probe to A0 and the other to GND |
| 2. Add Resistor | Connect a 10k ohm resistor between A0 and GND |
| 3. Upload Code | Use Arduino IDE to upload the code |
| 4. Open Serial Monitor | View moisture levels in real-time to manage your garden effectively |
Monitoring Sensor Readings
As you set up the soil moisture sensor with your Arduino for survival gardening, it’s crucial to ensure that all connections are made securely and the code is correctly uploaded. Connect the sensor’s probes to A0 and a 5V pin, and incorporate a 10k ohm resistor between A0 and GND to obtain precise moisture readings.
Open the serial monitor in the Arduino IDE to observe real-time soil moisture data, which will vary based on the soil’s moisture content. Adjust the code to establish threshold values that can trigger external components, such as a water pump, when moisture levels drop below a critical point.
Schedule readings at regular intervals to effectively conserve battery life, ensuring your plants remain hydrated during times of uncertainty.
Science Behind the Working of the Sensor
The science behind the soil moisture sensor is crucial for survivalists and preppers who rely on understanding their environment for successful cultivation and resource management. The sensor operates by measuring the electrical resistance between two probes, powered by 5 volts. In this context, the soil serves as a conductive medium, allowing for the flow of electrons.
Understanding soil moisture sensors is essential for survivalists and preppers, enabling effective resource management and cultivation strategies.
To simplify resistance calculations, a 10k ohm resistor is used as a reference point. However, it’s important to note that using direct current (DC) can lead to electrolysis, which may corrode the probes over time—a consideration for those looking to maintain their equipment for long-term use.
To combat this issue, implementing reverse polarity during readings can significantly reduce the electrolysis effects on soil ions, ensuring the longevity of the sensor.
Alternatively, for those who prioritize soil health and want to avoid direct contact between probes and soil, capacitive sensing methods present a viable solution. These methods minimize the risks associated with electric fields and offer a safer way to monitor soil moisture levels, aiding preppers in making informed decisions about water management and crop cultivation.
Measurement Techniques
In this section, you’ll learn how to power your probes efficiently to enhance their lifespan and minimize corrosion, which is crucial for survival situations.
You’ll also explore ideal reading intervals for effective moisture monitoring while conserving battery life, ensuring that your equipment remains operational during extended periods without resupply.
Finally, applying reverse polarity can help counteract electrolysis, ensuring accurate readings and prolonging the sensor’s functionality, which is vital for maintaining your preparedness in any environment.
Powering Probes Efficiently
To ensure efficient power management for soil moisture sensors in survival situations, activate the probes only during active readings. This strategy minimizes corrosion from continuous DC current exposure, which is crucial when resources are limited.
Periodically applying reverse polarity helps combat electrolysis effects, thereby extending the lifespan of the sensors—important for long-term preparedness. For effective moisture monitoring, take readings every few minutes to conserve battery life and reduce wear on the probes, essential for maintaining operational equipment in the field.
Implementing a pull-up resistor guarantees low current drain when probes are idle, enhancing overall energy efficiency. By programming digital I/O lines to power the probes in both directions, you can achieve versatile measurement techniques while efficiently powering the probes and accurately gauging soil resistance—vital for successful gardening or foraging in a survival scenario.
Reading Intervals Management
Efficient management of reading intervals is crucial for maximizing the performance and longevity of soil moisture sensors, especially in survival situations where resources are limited.
Program your readings to occur every few minutes, striking a balance between effective moisture monitoring for your crops and minimal battery drain for your survival gear. Use stainless steel probes, as they resist corrosion better when powered briefly during readings, which should last around 50 milliseconds.
Implementing a pull-up resistor reduces current consumption when idle, enhancing energy efficiency—an essential factor in prepping scenarios. By utilizing digital I/O lines, you can power the probes in both directions, ensuring accurate measurements while reducing wear on components.
Proper reading intervals management can significantly extend your sensor’s lifespan, making it an invaluable tool for self-sufficiency and sustainable living.
Polarity Application Benefits
While measuring soil moisture in survival situations, applying reverse polarity can significantly improve the performance and longevity of your sensor probes. This technique minimizes electrolysis effects on soil ions, reducing corrosion and ensuring your equipment remains reliable.
By powering probes only during active readings, you limit continuous exposure to DC current, extending their lifespan—a crucial factor when resources are limited. Incorporating a pull-up resistor during idle times helps maintain a low current drain, preserving battery life and preventing unnecessary wear, which is vital in prepping scenarios where energy conservation is key.
Programming reading intervals, such as every few minutes, strikes a balance between effective moisture monitoring and energy efficiency. Finally, utilizing digital I/O lines for bidirectional power allows for controlled current application, ensuring your probes stay functional and protected—ideally encased in heat shrink for added durability in the field.
Corrosion and Longevity
Corrosion can significantly hinder the performance of soil moisture sensors, which are crucial tools for preppers and survivalists aiming to efficiently manage water resources. The direct current (DC) flowing through the probes can lead to electrolysis, causing deterioration over time.
To mitigate this issue, consider switching to alternating current (AC), as it helps reduce the buildup of corrosive ions that can damage the probes. Powering the probes only during active readings and utilizing reverse polarity can also greatly extend their lifespan, making them more reliable for long-term survival applications.
While many commercially available stainless steel probes may leach trace amounts of chromium, using low current reduces this risk significantly. Additionally, applying protective coatings such as varnish or heat shrink to the buried sections of the probes can enhance their durability and resistance to corrosion.
This ensures that your soil moisture sensors remain effective, allowing you to maintain optimal soil conditions for food production in any survival situation.